As members of digital society, we are surrounded by digital devices – computers, mobiles, digital cameras, music players, tablets, etc. Different digital devices might use different storage media for extended storage capacity. Therefore, most of the times we end up with a bunch of portable disks in hands.
How to manage USB flash drives, SD memory cards, and external hard drives altogether more efficiently? iBoysoft Drive Manager for Mac platform is the tool I found handy.
Table of Contents
Write to Microsoft NTFS-formatted drives
By default, macOS can only read Microsoft NTFS-formatted drives but can’t write to them. That is to say, I can only view the files on an NTFS drive on Mac but can’t make any changes to it. It is very inconvenient to edit files on NTFS-formatted disks on Mac, isn’t it? I know to reformat the disk into FAT32 or exFAT, which is fully compatible with both Windows and macOS, can solve the issue. However, I would like a tool to make things easier, so I downloaded a disk management tool called iBoysoft Drive Manager. The software can mount NTFS drives or partitions in read-write mode automatically. It seems that the NTFS write support exists on Mac natively. Then I can edit, rename, delete, and move around the files stored on NTFS drives hassle-free. Saving new files onto the NTFS drives on Mac is easy too.
Manage multiple external drives in one place 
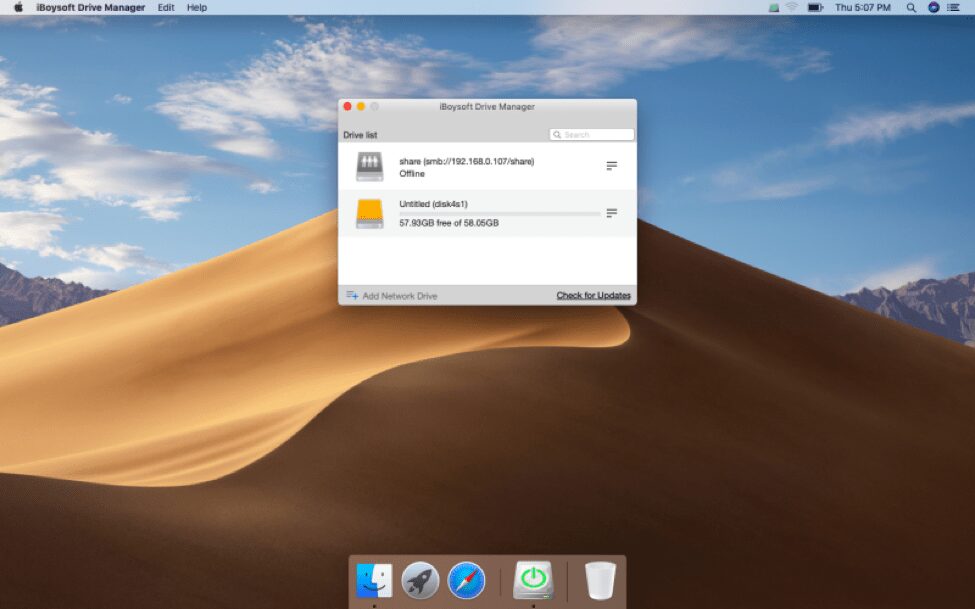
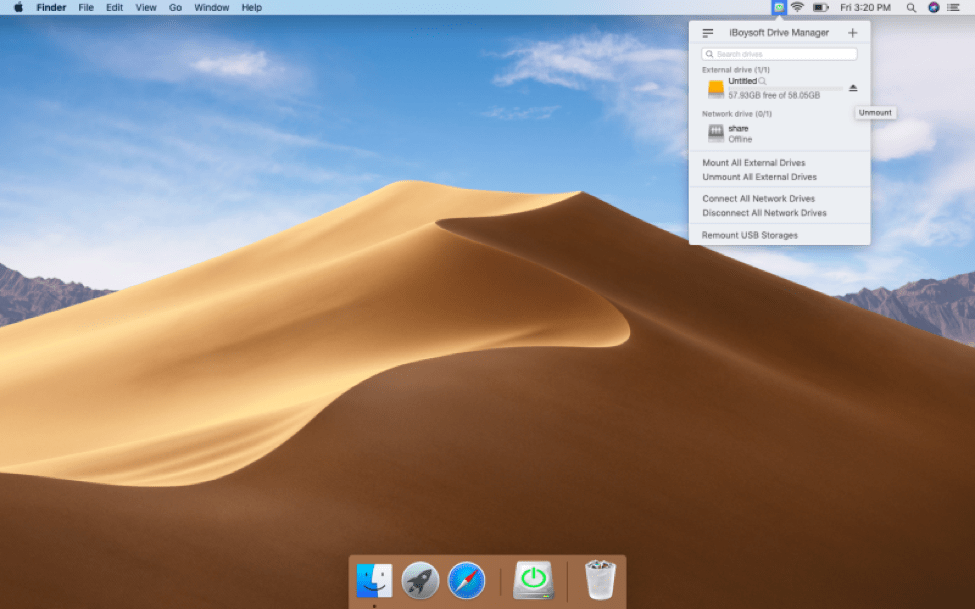
It is common to have multiple portable drives connected to a Mac at the same time. To prevent the disk from corruption, we should eject or unmount them safely first before turning off the computer. iBoysoft Drive Manager can help me mount and unmount all attached USB flash drives, SD cards, memory sticks and external hard drives with one click. All common file systems are supported by this utility including NTFS, APFS, HFSX, HFS, HFS+, FAT32 and exFAT. I don’t have to unmount them one by one. Additionally, it supports mounting or unmounting a specific disk too, to avoid accidental deletion or other unintentional operations to the disks.
Map multiple network drives as local drives 
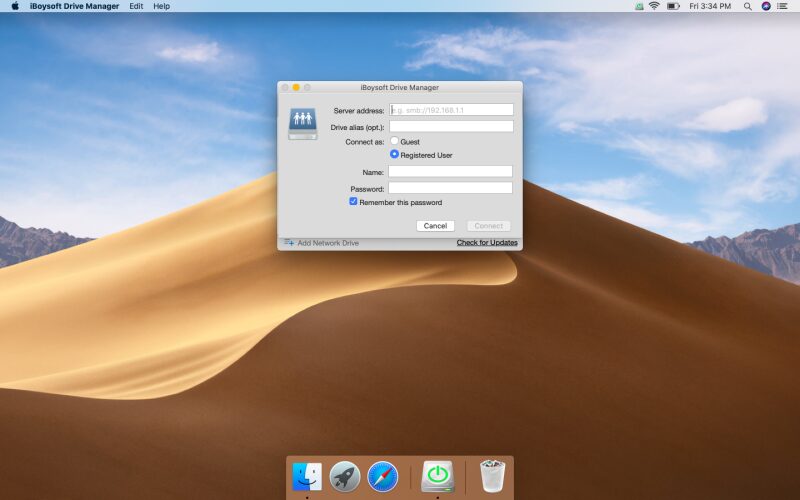
Many people like me love to have one or more network drives to store files without taking up the computer’s storage space. Every time I turn on my computer and want to access my network drives, I need to enter my password for each of them. iBoysoft Drive Manager allows me to manually add network drives by providing server address, username, and password. Once a network drive is added, the software will automatically connect it after the computer is turned on and the software is launched. Also, I can connect and disconnect the network drive in the drop-down interface with one single click.
Disk search and file search
In the drop-town window, I can search for a specific volume or disk I want to work on by inputting part of its name. It helps me navigate the volume or disk fast. Moreover, in its drive list window, by inputting specific information in its research box, the software can list all found files from all attached portable disks. For example, I type in “.png” in the search box, iBoysoft Drive Manager will list all PNG pictures on my drives. Then I can view the desired pictures quickly without digging through all drives.
Nice user experience 
Usability is one of the important criteria for a good utility to me. iBoysoft Drive Manager is fast and easy to install and use without any extra troubles. Here is how to use it.
Step 1: Download, install and launch iBoysoft Drive Manager on Mac by following the wizard.
Step 2: Connect removable drives to the Mac.
Step 3: After getting the notification that drives are mounted successfully, drives will be opened automatically by default. There will be no problem reading and writing to NTFS drives or the drives with other file systems.
Conclusion
Need NTFS write support on Mac? Want to manage external and network drives more efficiently on Mac? iBoysoft Drive Manager can be a good choice.


